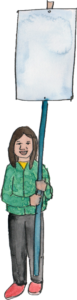
 Crossbar flags can be carried above people’s heads, adding height to a group of people at the same time as keeping the images and messaging visible even in a crowd.
STEP ONE: GATHER SUPPLIES
- White or light colored fabric
Try to find lightweight muslin, cotton, polyester or other lightweight non-stretchy white fabrics such as old sheets. You can sometimes get old sheets for free from hotels or industrial laundry companies. - Latex or acrylic paint
Get bright strong colors of latex house paint or large (½-1 gallon) containers of acrylic. If paint is thick, thin it with about 1 part water to 3 parts paint, so it flows easily, but still covers solidly.
Don’t use oil-based paints because they are difficult to clean up, they smell badly and they dry slowly. Tempera paints aren’t good either, because they aren’t permanent and will run and wash away if the flag gets wet.
- Lath sticks
Flat narrow wood strips (about 1 1/2 x 1/3 inch/38mm x 8.5 mm).
Lath is used to back plaster walls and for fence trellises, so you can find it garden centers or construction supplies.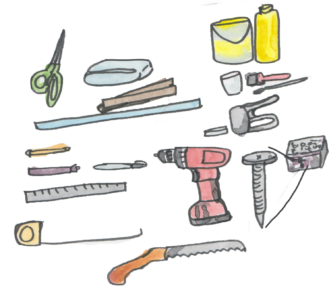
- Wood poles (8 feet tall, 1×2 inches/2.44 meters tall, 25mm x 50mm) ‘furring strips.’ Make sure they don’t have big knots that might break while carrying.
- Duct tape
- Paper
- Pencil and marker
- Staple gun and staples
- Drop cloth
- Paint brushes (have a variety of sizes and good quality – not frayed)
- Old yogurt or plastic containers (and some lids)
- Measuring tape
- Scissors
- Straight edge (ruler or meter stick)
- Screws (3/4 to 1 inch/19mm – 25mm) ‘truss head’ (washer head) screws or wood or sheet-metal screws.
- Cordless drill
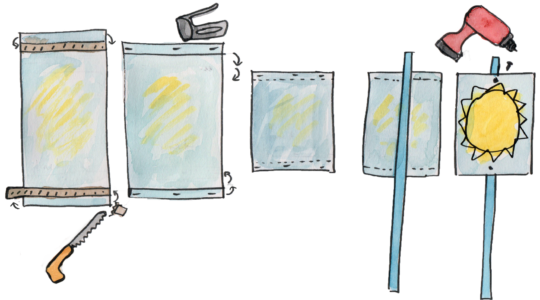
STEP TWO: CUT FABRIC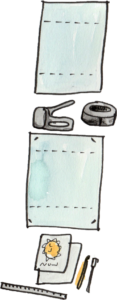
- Spread out your fabric and measure it. Measure out flags about 24 x 40 inches/60cm x 100cm. (This will include ~6 inches/15 cm of excess fabric to wrap around the top and bottom sticks.)
- Adjust the flag size to make best use of the size of fabric you have and to best fit your desired design. Cut with the grain of the fabric to get started, and then tear the fabric to size.
STEP THREE: STAPLE DOWN
- Create a painting table with a sheet of not-too-rough plywood placed on top of a table or sawhorses, and then staple the flag fabric to the plywood in four corners, pulling it tightly so there are no wrinkles. You can also do this with masking or duct tape.
- If you don’t have plywood you can also lay a drop cloth down underneath your flag. Tape the drop cloth to keep it from moving and tape the flag fabric to the drop cloth.
STEP FOUR: DESIGN
Draw your design — first on paper, then on the flag fabric.
Design tips:
- Less is more; sticking with a few shorter words and simple bold images makes your message stronger and easier to read.
- A light/dark color contrast also makes it more readable. One option is to paint a light color over the whole flag as a primer, let it dry, then draw your design and paint with much darker colors.
- When you are planning and drawing your design on the fabric make sure you leave extra fabric (6 inches/15 cm) at the top and bottom to wrap around the sticks.
STEP FIVE: PAINT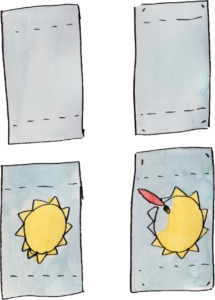
- Put the paint into a plastic container and thin with water a bit to make it easier to paint with, but not so much it bleeds or looks thin.
- Have a variety of brushes, including foam brushes, to match your paintbrush to your letter size.
- After you paint your design let the flag dry, then pull it off the plywood.
- You can also choose to screen print or stencil a design on the flags instead. These are most often a single color design, so after you print the base design on each flag, you and volunteers can add a hand painted element to each flag.
STEP SIX: ATTACH TO POLES
- Cut the lath slightly shorter than the width of the fabric, so it’s not visible or sharp.
- Use a staple gun to staple the edge of the fabric to the outside edge of the stick. Roll the stick over twice and securely staple the fabric to the stick. Use ¼ inch/ 6 mm staples–or just shorter that the wood thickness, to avoid sharp edges. Repeat this step at the top and bottom of each flag.
- Then attach your vertical flag pole using the screws and the cordless drill with a phillips bit to screw the middle of the top and bottom of the flag sticks securely into the vertical flagpole. You can either assemble them onsite to make transport easier or else bundle them up 4-6 per bundle for transport and carrying to site.
STEP SEVEN: CARRY!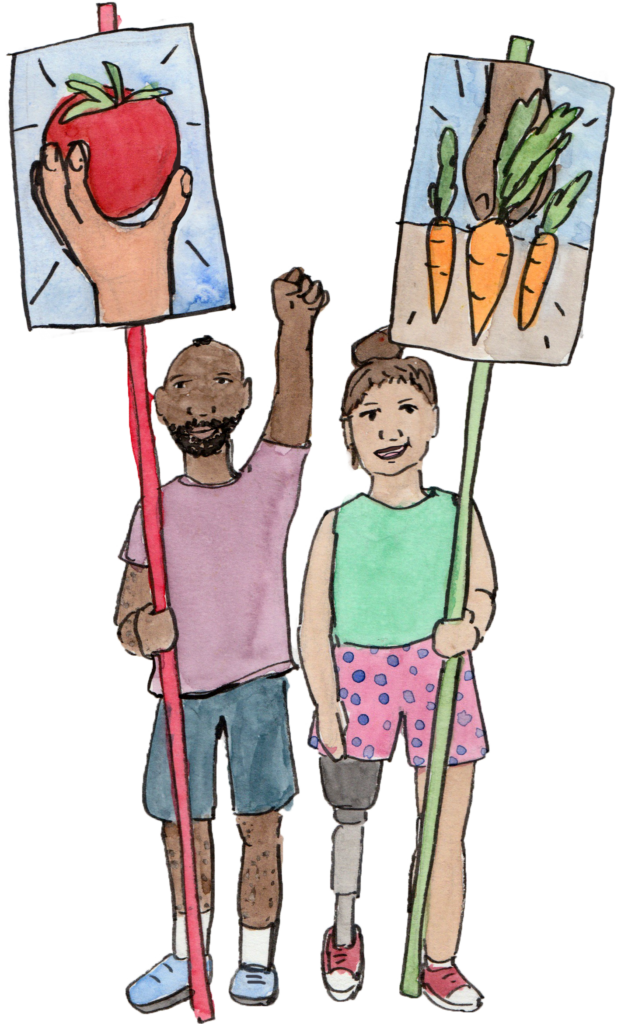
- Have people available to carry the flags at the event or action, or arrange to hand them out to attendees and collect them again at the end.
- When the flags are being carried, check if they are in the best place and facing the right direction. Consider if you want them to move as a line or groups of flags, or with some choreography.
- They can make a powerful visual, especially positioned right behind a hand-held banner people hold below their heads.