 You can stencil onto:
- Clothing
Such as shirts, jackets, vests, etc. You can make matching shirts for a group or event. - Posters
You can use stencils to make posters – just keep it simple! - Flags
You can stencil an image for crossbar flags or other types of flags. - Banners
Stencil onto fabric to make lots of small banners. This is a great way to have a visually unified presence at an event. (Remember you can easily dye fabric with house paint and water.) - Placards
Make cardboard signs and print your stencil onto the sign to carry at an event - Buildings
A.k.a. street art! Putting your message into public spaces is a great way to get it seen. Doing this also reclaims the concept of public space by making it participatory and interactive — a model for what other societies are possible.
You can also stencil on paper (like a poster) and wheat-paste the posters up. - Patches or armbands
Stencil onto small pieces of fabric and sew or tie on.
- More stencils
Stencils can be reproduced easily — just stencil onto good material then cut it out. This is especially good if your original stencil gets worn out.
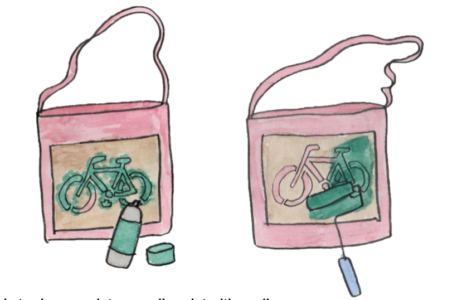
- Tote bags…. and more!
Stencilled clothing, bags and patches are great items to sell for fundraisers!
STEP ONE: GATHER SUPPLIES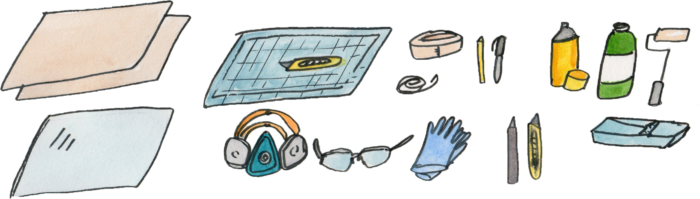
- Thin cardboard or thin plastic such as mylar, acetate sheets, or any water-resistant heavy paper. Cereal-box weight cardboard works well.
- Spray paint or acrylic or latex paint
- Mask and gloves (for safe spray painting)
- Rollers or sponges (if not using spray paint)
Rollers are faster, but sponges also work
- Utility knife and extra blades (have many of these if many people are making stencils)
- Cutting mat (to use with utility knife. Have many of these if many people are making stencils)
- Surfaces to stencil onto such as fabric, paper or signs
- Thin wire (to reinforce bridges, and also bring wire cutters)
- Pencils, sharpies and scrap paper
- Rags
- Drop cloth(s)
- Ruler(s)
- Adhesive (such as repositionable spray adhesive or painters’ tape. Don’t get heavy duty permanent spray adhesive!)
- Stabilizer (optional but can be useful) such as a stick, dowel or pencil
- Scrap material (to test print onto such as newsprint, extra cardboard….)
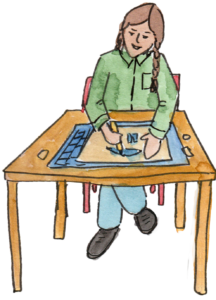
STEP TWO: CHOOSE OR DESIGN AN IMAGE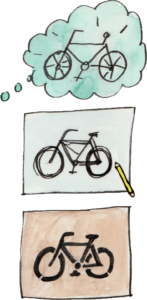
First you need to choose or design an image.
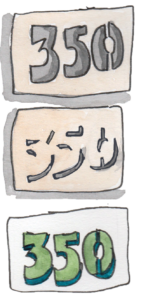
- You can use an existing image from 350 or other organizations, you can commission an artist in the community to design some images for your group to use, or you can design your own image.
- In any case think about the message you want to share through image and/or text and choose, commission or develop accordingly! If you are designing your own start with some sketches.
- Stencils could range from simple to complex and anywhere in between, but starting off simple helps to get the hang of it.
Next turn your sketch into a stencil design
- If you are creating a design, remember:
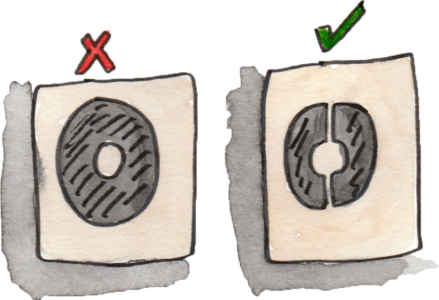
- When designing a stencil image (as with most design) you are working with two elements – negative space and positive space. The negative space is space around an object/image (i.e., background) and positive space is the object or image.
- For a basic stencil you will create a two-color design. You cut your positive space out of your stencil material and these areas will be the color of the paint. Whatever you leave covered by the stencil (negative space) is your surface color that you are stenciling onto.
- In your design make sure there are no negative spaces (what stays) fully surrounded by positive space (what you cut away). The positive spaces which could completely close, eliminating negative space inside of them, are called islands – such as the middle of an A, O, B, etc. Your islands need to be attached by ‘bridges’ to another section of negative space.
- If you have thin bridges you can reinforce them by taping wire to them.
A FEW MORE DESIGN TIPS
 It can be helpful to look up ‘stencil design’ or ‘stencil template’ online for ideas, to see how others have designed images, and to see the way that the negative and positive space works.
- You can create your design by hand or on the computer.
- With a digital image you could then print it or project it to transfer it to your stencil material.
- If you print an image you can glue it to your stencil paper and cut through both layers together.
- You can trace it on if you are using a clear surface such as mylar or acetate, or if you get enough light coming, through you can hold it up to a window to trace.
- Another good way to trans
 fer images onto your stencil material is to cut your design out on paper first (either your drawn design or a printed design), and then paint or trace the image onto your sturdy stencil material from your paper ‘stencil’. This way you can also make sure there no islands.
 - If you want additional colors, you can make a multi-layer image. Each color will need its own stencil. Put matching marks on each stencil so you know how to line them up easily and plan the designs to work together.
STEP THREE: CUT OUT YOUR STENCIL
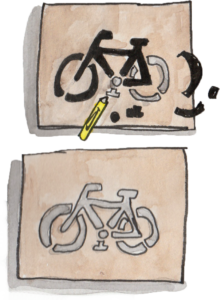
- Cut with the utility knife on a cutting mat. It can be helpful to turn the stencil to make cuts at a comfortable angle rather than manipulating the knife in odd ways.
** Keep your fingers safe by keeping them away from the blade and always cutting directionally away from your fingers. ** - Sharper blades cut better, so have extra blades, and don’t hesitate to switch when one gets dull.
- Discard the sharp blades safely (i.e., wrapped in cardboard and tape, or in a taped container and labelled ‘sharps’ ).
- If you discover you had an island without a bridge (after you have cut it), don’t fret, you can re-attach it with a wire or cardboard bridge taped to the back of the stencil.
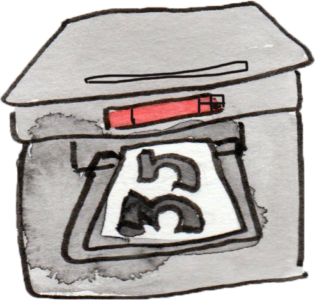
STEP FOUR: PRINT YOUR STENCIL
Now it’s time to put your stencil to use! Use a roller or spray paint.
- Get whatever you are planning to print on ready. Have scrap paper ready to do a test print on before you go ahead with all your printing.
- Prepare your paint and painting space. Lay drop cloths to keep the table or floor clean.
- Use repositionable spray adhesive or tape to secure your stencil to the surface that you will be printing onto. This is to keep the stencil from moving to make the image as crisp as possible.
- If you have areas of the stencil that are sticking up, you can use the stabilizer pencil or stick to hold that area down. Using a pencil or stick keeps paint off of your hands.
- Tip for t-shirts:
- Put a piece of cardboard inside so the paint doesn’t bleed through the front of the shirt to the back, or vice versa. Latex paint works great with normal t-shirts. Spray paint can be used with thin and light coloured fabric. You can also get fabric paints from art or craft stores.
- Put a piece of cardboard inside so the paint doesn’t bleed through the front of the shirt to the back, or vice versa. Latex paint works great with normal t-shirts. Spray paint can be used with thin and light coloured fabric. You can also get fabric paints from art or craft stores.
 Spray painting a stencil
- Spray paint works well if you need to be quick, or if you are working on a rough surface. It tends to leave the crispest image, but it is more expensive and more toxic than house paint.
- Use spray paint outdoors and wear a mask and gloves.
- Follow the instructions on the can – shake before use. When you are done for the day, spray upside down to empty the nozzle.
- Spray in short strokes with the can held horizontally. Don’t angle the spray can to avoid pointing underneath the edges of the stencil.
Using Latex house paint or acrylic paint with a roller or sponge 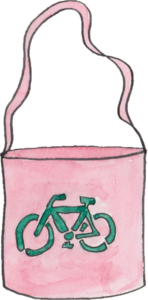
- Pour the paint into a paint tray and roll or dab the sponge with paint from there.
- The trick is to get just the right amount of paint on the roller (or brush or sponge) you are using. Do a few practices on cardboard or scrap paper.
- Aim for a medium thick and even coat. Thick paint can glob underneath the stencil. If your paint tray is small, or you don’t have one, you can also roll your paint out on a paint palette or a piece of cardboard before rolling over the stencil.
- When printing many of the same stencil, wipe the stencil off extra paint or let it dry when the image stops being crisp. Never put anything on top of a wet (or even damp) stencil, or it will stick and rip the stencil.
- If you spray-painted an image for posters or flags, you (or others) can add hand painted elements of the images after they are printed. This is also a great way for a group of volunteers or event attendees to add a personal touch onto a unified visual.